A Deeper Understanding Of Auto-Blogs(Part 1)
I believe that many people who have entered the online affiliate marketing field have such a dream: Can I set everything up, the US dollars will automatically enter my account, so I can make money without doing anything else. The answer is “YES“! but it requires some tricks and it takes some time to accumulate.
This article will introduce the “Auto-Blogs” method in depth, so that blogs can automatically publish content, automatically gain traffic, and automatically earn dollars, yes, everything is “automatic“. And this is part one.

Choose Domain Name & Server Provider
The first step, of course, is to choose the domain name and server provider. It is important to choose a well-known provider with many years of operational experience. Namecheap is highly recommended to provide domain names and server services.
The process of purchase is simple, it will not be explained in detail, here we will focus on the tips of domain name selection.
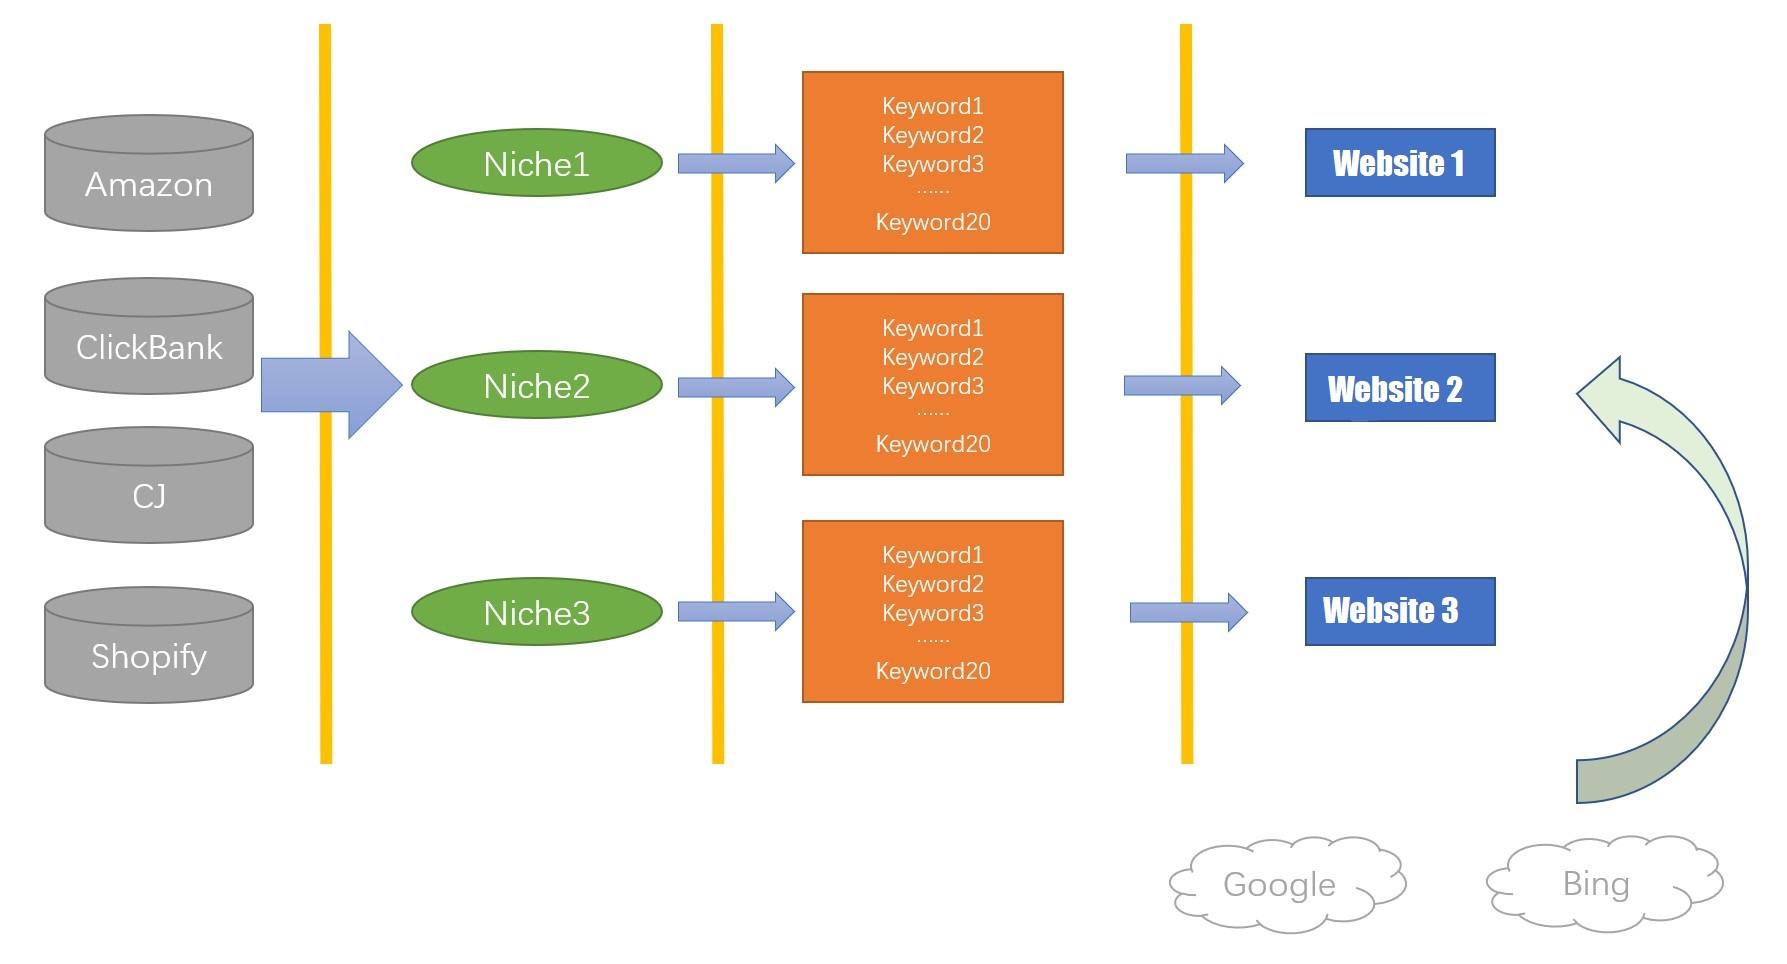
The first step is to determine the niche of your website. For example, If you want to do marketing related to women’s handbags, the keyword may be “Handbags”.
Then we must find the long tail keywords in this field. Why?
First of all, keywords which are too broad are difficult to rank. Usually, the top rank positions of these words are large websites which have lots of high quality external links. It is difficult to beat them.
Secondly, there is no benefit for using too broad keywords in “precise marketing”. Of course, the long tail keyword means less search volume, so we should focus on selecting long tail keywords with relatively more search volume and less competition.
The keyword analysis tools, we highly recommend the Google official tool – Google Ads Keyword Planner.
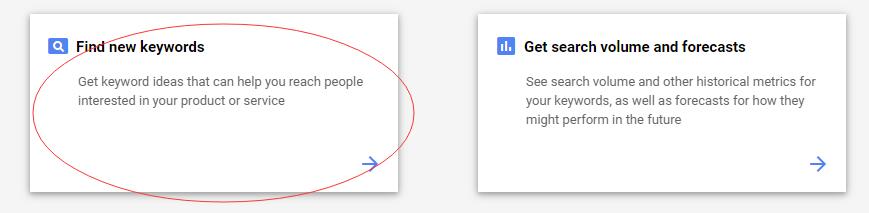
After entering Keyword Planner, select “Find new keywords” and input “handbags”.
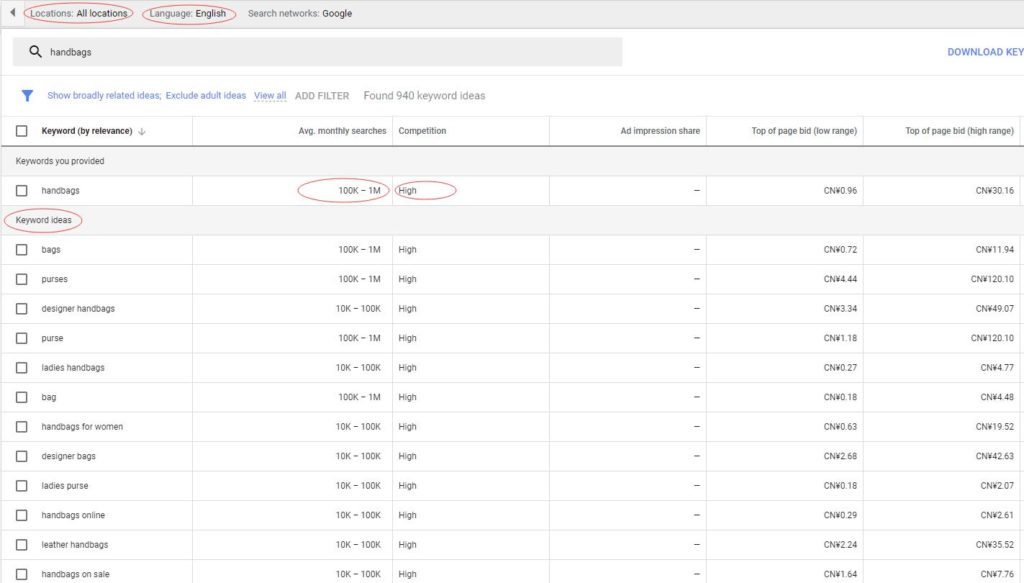
Note: Select “All locations” & “English”, then the following will display the monthly search volume and competition level of the “handbags”, of course our purpose is not the keyword “handbags” itself, but for the large number of “Keyword ideas” that appear below.


After sorting according to the competition, we can choose the “handbag designs” which is in medium competition level and the search volume is 1K-10K. After the Google search, the top rankings are also the internal page of the website. So we can consider this keyword, then we can go to namecheap to apply for a domain name, “handbagdesigns.com” or “besthandbagdesigns.com” will be fine. Of course, if the domain name has already been registered, we can choose other names.
After the purchase of domain and server, we can install WordPress on the server. The installation process is not described here, there are many online tutorials. Go directly to the next step.
Install plugins & Configure Auto-blogs
Second step, the installation of the necessary plugins and the settings of the Auto-blogs. The whole automation involves the collection of website content, the automatic release of content, the ways to drive traffic and the methods to profit. The methods to profit will be discussed in the next article, here we will talk about the first three parts.
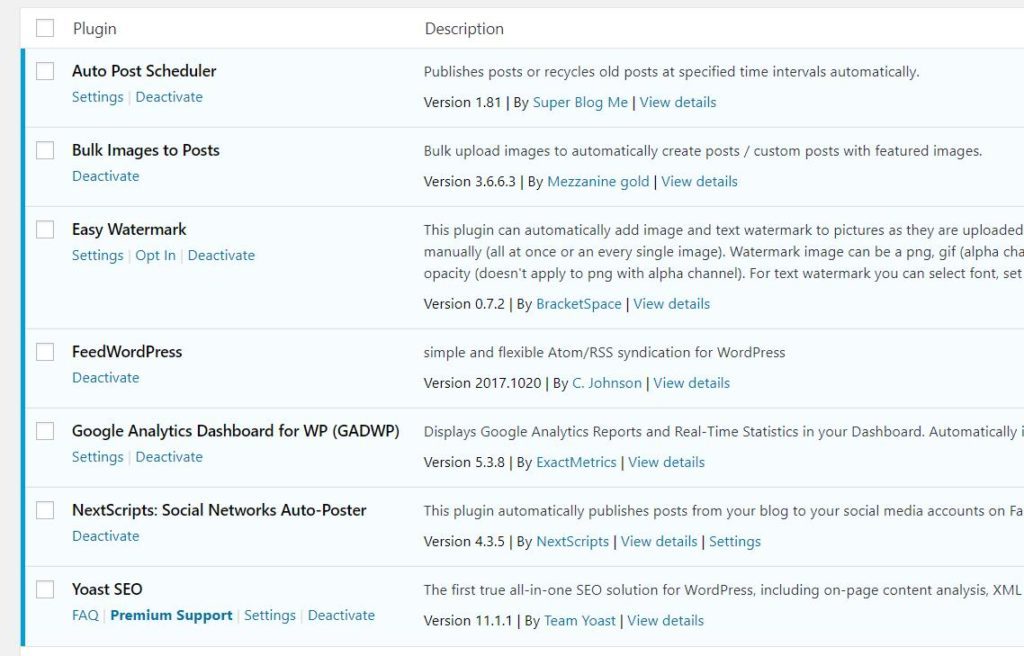
Install the following plugins:
Easy Watermark: used to automatically watermark pictures.
Yoast SEO: most powerful SEO tool, highly recommended.
NextScripts: Social Networks Auto-Poster: very easy-to-use social media sync tool that supports automatic syncing to over 25 social media such as Facebook, Twitter, LinkedIn, Google+, etc.
Auto Post Scheduler: automatically publish drafts or old posts according to time and quantity rules.
Bulk Images to Posts: generate posts in batches from images, this is a way to generate content, detailed below.
Google Analytics Dashboard for WP: Google Analytics tool, you can obtain information such as website traffic, traffic sources, etc.
FeedWordPress: RSS content acquisition tool, this is another way to generate content, detailed below.
As mentioned above, the first thing for automation is to automatically collect content. The more content, the more traffic.
Bulk Images to Posts
The above two plugins provide two different methods. One is Bulk Images to Posts, which automatically converts uploaded images to posts.
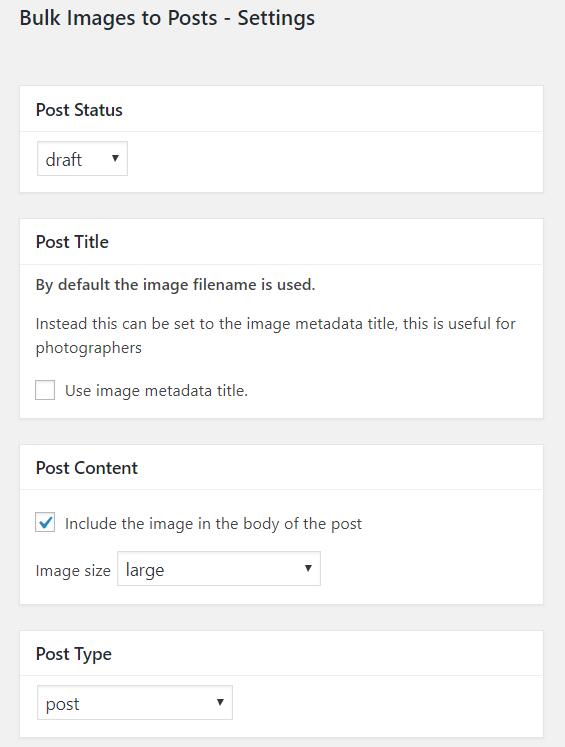
First switch to “Bulk Images to Posts – Settings” page, select Post Status as “Draft“, Post Type as “post“. That is, the uploaded image will automatically generate a post, and the status is draft, which is convenient for subsequent scheduling.
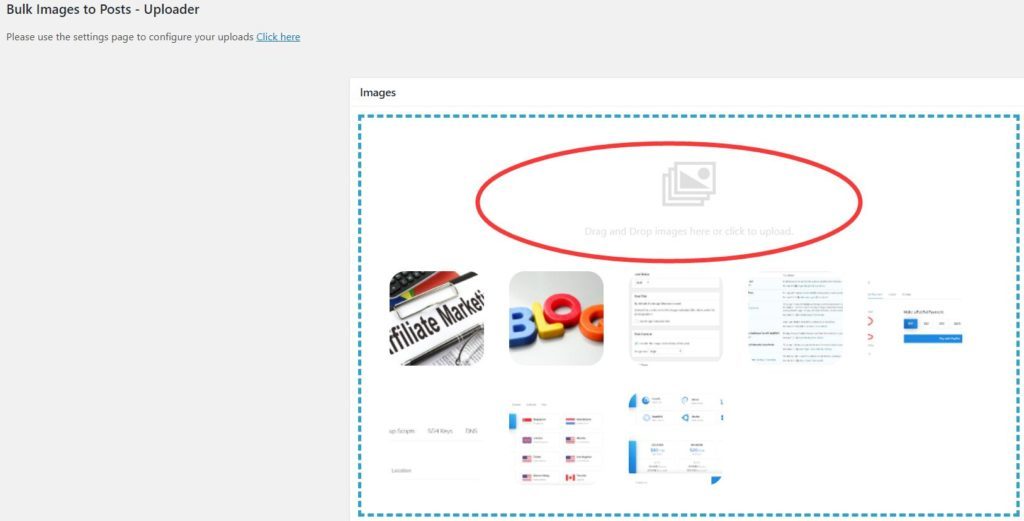
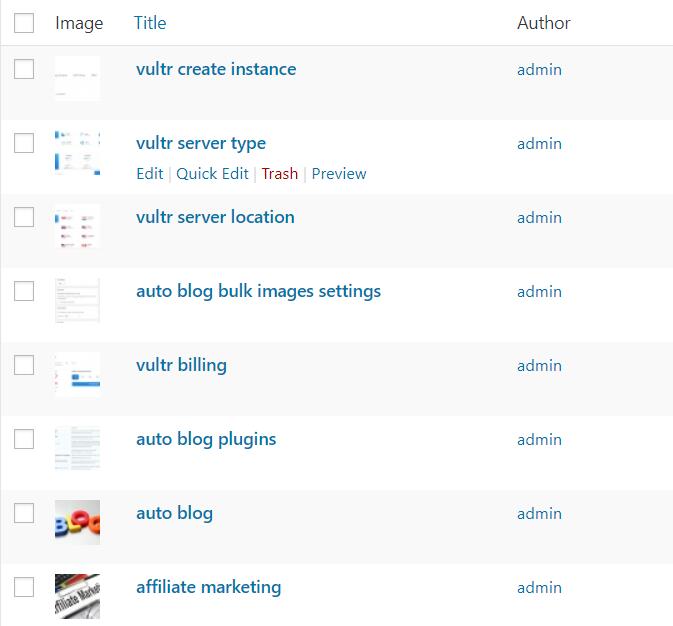
The title of the post is the image file name in default, and of course it can be set to metadata. After the setup, go to “Bulk Images to Posts Uploader” page, upload the images in bulk, then the posts will be generated in bulk.
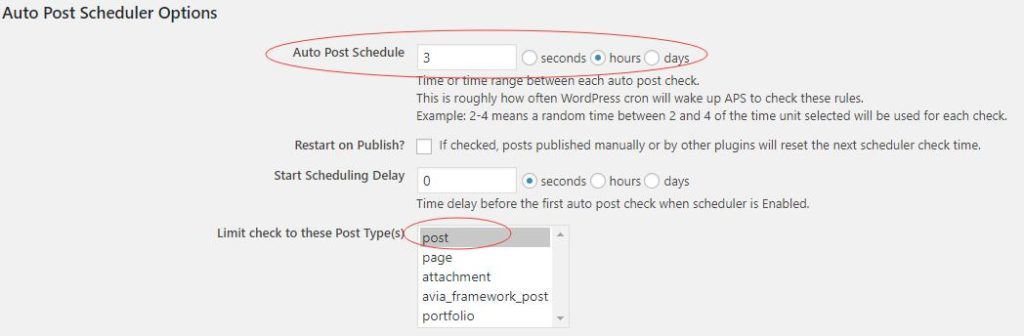
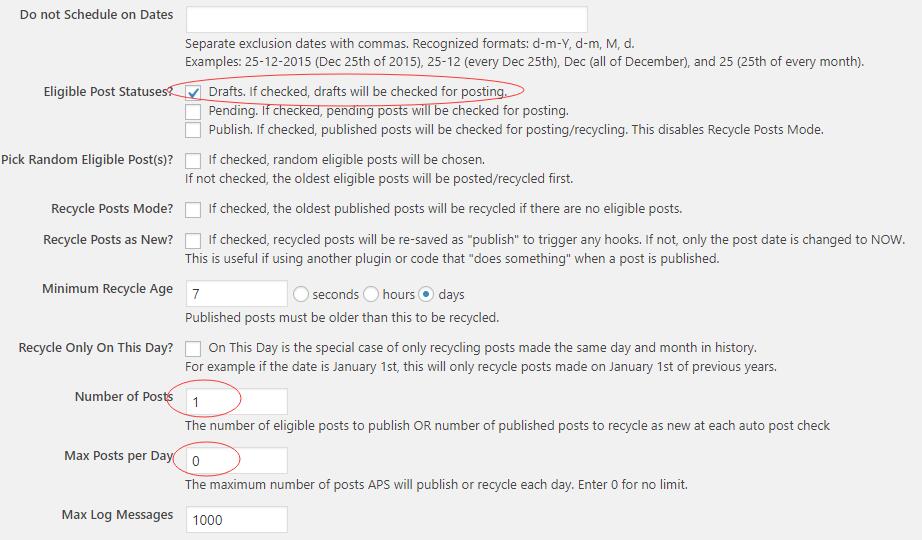
After batch generation of Draft Posts, we can use the Auto Post Scheduler plugin to schedule the posting. The setup is simple, set the post type, check interval, etc.
FeedWordPress
The second way to automatically collect content is to automatically collect content of the RSS feed using FeedWordPress plugin.
There are many tutorials on the Internet about RSS, so here we will talk about how to get the right RSS feed.
For example, we can search for “Handbags Tumblr” directly in Google, then we will find a lot of Tumblr blogs with pictures, then we will find their RSS source urls, for example: https://XXXXXX.tumblr.com/rss.
NOTE: Find a blog that posts frequently, otherwise your own blog will not be updated.

When setting up, first add the RSS source address to the Syndicated Sites Settings, you can add multiple sources.
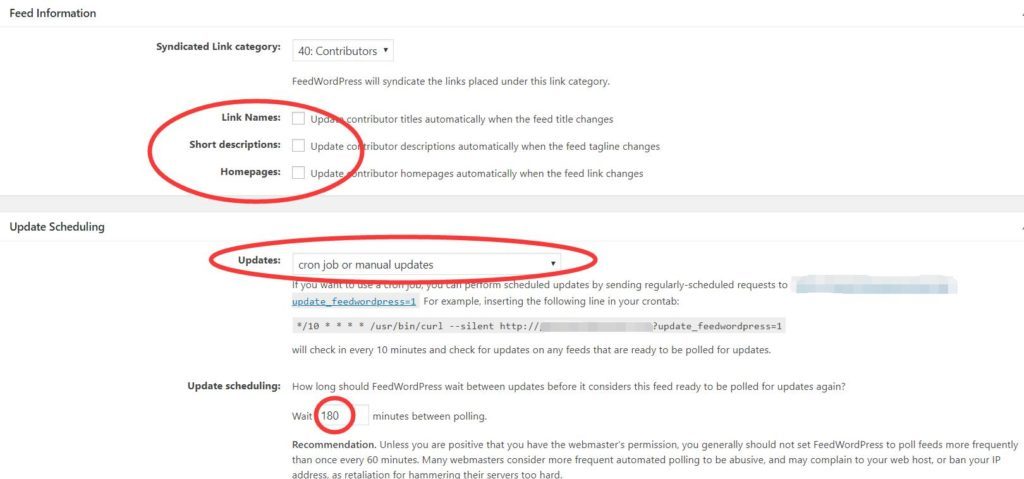
Switch to the Feeds & Updates page, cancel the options under Feed Information.
Select “cron job or manual updates” in Update Scheduling, we will use cron job to complete the automatic collection of content. How long? For example, if you have one RSS feed, then if you set it to 180 minutes, that is, 3 hours to check it, then 8 posts will be sent every day.
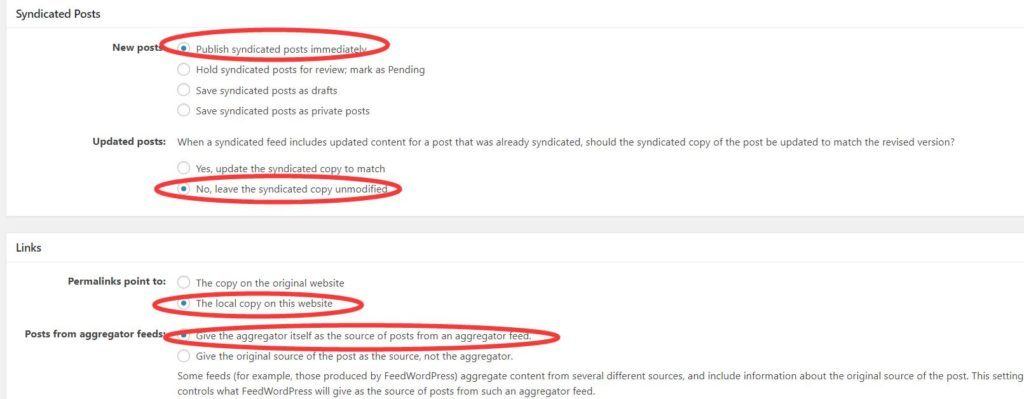
Switch to the Posts & Links page and select: “Publish syndicated posts immediately“, “No, leave the syndicated copy unmodified“, “The local copy on this website“, “Give the aggregator itself as the source of posts from an aggregator feed“.
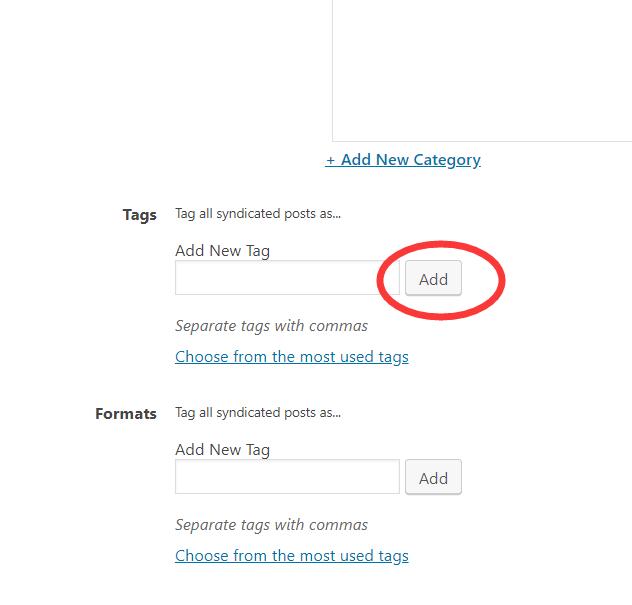
Finally, on the Categories & Tags page, you can add tags as needed.
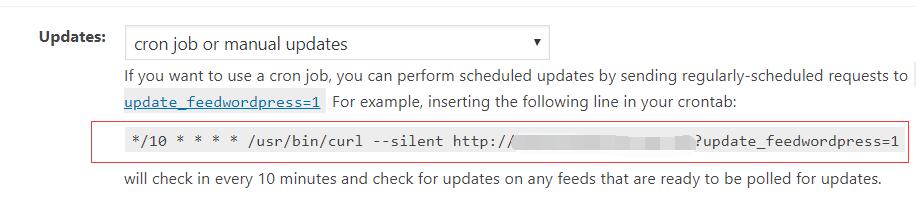
Almost forgot, we also need to open Cpanel, add the command line above in the screenshot. Now you can automatically collect RSS feeds.
Considering the length, how to drive traffic will be introduced in the next article.